


Published on Apr 02, 2024
This activity highlights the connection between nanotechnology and art— specifically though the production of medieval stained glass. Visitors will observe that nanoparticles behave differently than bulk material. Visitors will create (in collaboration with other visitors) a stained glass panel using solutions of nanosized gold and silver particles. Visitors will be given the opportunity take a piece of mock stained glass home with them.
Interesting properties of gold and silver nanoparticles have been used for centuries by stained glass artisans.
By participating in this activity, visitors will:
1. Understand that nanoparticles of gold and silver behave differently than bulk gold and silver.
2. Appreciate the interconnection between science and art.
3. Learn that nanotechnology has been used since the Middle Ages, even though stained glass artisans did not know they were using this technology
Nano is the scientific term meaning one-billionth (1/1,000,000,000). It comes from a Greek word meaning “dwarf.” A nanometer is one one-billionth of a meter. One inch equals 25.4 million nanometers. A sheet of paper is about 100,000 nanometers thick. A human hair measures roughly 50,000 to 100,000 nanometers across. Your fingernails grow one nanometer every second. (Other units can also be divided by one billion. A single blink of an eye is about one-billionth of a year. An eye blink is to a year what a nanometer is to a meter stick (yard stick).) Nanoscale refers to measurements of 1 – 100 nanometers (nm). A virus is about 70 nm long. A cell membrane is about 9 nm thick. Ten hydrogen atoms lined up in a row would be about 1 nm long. At the nanoscale, many common materials exhibit unusual properties, such as remarkably lower resistance to electricity, or faster chemical reactions. Nanotechnology is the manipulation of material at the nanoscale to take advantage of these properties. This often means working with individual molecules. Nanoscience, nanoengineering and other such terms refer to those activities applied to the nanoscale. “Nano,” by itself, is often used as shorthand to refer to any or all of these activities.
A material’s properties (i.e. electrical behavior, magnetic behavior and color) are sometimes dramatically different on the nanoscale (1-100 nm). For example, a gold ring is yellow and shiny. If heated up, it would melt at 1,946 °F. (Silver melts at 1,762° F.) It conducts electricity. Gold behaves a lot like many of the other metals people are familiar with. If the gold ring were cut in half, each half would have the same properties, e.g., color, melting point, conductivity, etc., as the whole ring. Even if the gold ring were cut many, many more times, perhaps down to the size of a grain of sand, the properties of the small piece of gold would be the same. However, if the small piece of gold were cut in half many more times, until each piece was under 100 nm in size, the properties of the gold would start to change. One visible property that can change is the color of the nanoparticles.
At the nanoscale, gold particles can be orange, purple, green or red depending on the size of the particle. In the solution used in the demonstration, the gold particles are approximately 25 nm in diameter and appear red. Similar changes occur with silver particles on the nanoscale. Silver nanoparticles appear yellow, red or blue, depending on the particle size. The solution used in this demonstration appears yellow because the nanoparticles are approximately 100 nm in diameter.
This property is used in other ways in addition to stained glass. For example, particles of titanium dioxide (TiO2) have been used for a long time as the sunblocking agent in sunscreen. The white color of these creams comes from the way that the particles of TiO2 interact with sunlight. However, nanosized particles of titanium dioxide interact differently with light and appear colorless. Sunscreen manufacturers have used this property to make creams colorless (or clear). In addition to sunscreens, nanoparticles are also used in paint, cosmetics and even inkjet paper.
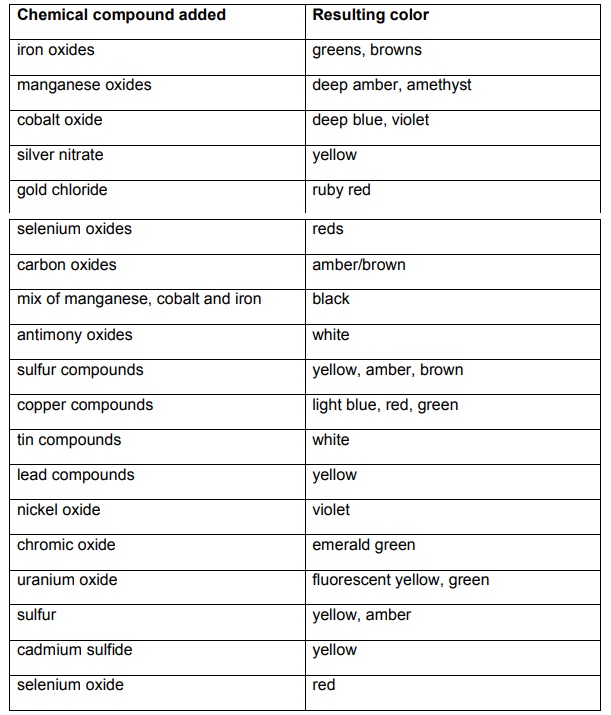
The glass itself was made from melted sand (SiO2). Pure sand required very high temperatures, near 2,500 ºF. However, artisans discovered that adding additional ingredients caused sand to melt at a much lower temperature. A mixture of sand, soda ash, lime, potash and lead oxide caused the sand to melt at temperatures around 1,500 ºF. Once molten, coloring agents, or colorants, were added. The colors in the stained glass can be attributed to different chemical compounds that were added to the molten glass during processing. In some cases, the colorants were part of the basic glass making process (i.e.,impurities found in the sand used to make the glass, or from smoke generated in the firing process). Artisans noted that different compounds gave rise to different colors. For instance, ruby glass was created by adding gold chloride, while uranium glass, which glows in the dark, was created by adding uranium oxide. Below is a table that lists the different chemical pigments that artisans used to color glass. The sources for chemical colorants (typically metal oxides, sulfides and chlorides) were minerals.
• Power Point slides (available for download)
• Meter stick
• Consumer products containing silver nanoparticles (e.g., athletic socks or silver enhanced storage containers)
Take-home card:
• Take-home cards printed on cardstock (files available for download)
• Circular craft punch to make “windows” in cards
• Lamination sheets cut in 1.5” x 1.5” squares (2 squares for each take home card)
• Pre-made nanostained glass pieces (silver and gold) (see etup section for preparation)
• Scissors
• Containers to organize components (suggested)
• Colored pencils/crayons (optional)
• Eye protection
• Latex or Nitrile gloves
• Magnetic stir bar
• Hot/stir plate (or a separate hot plate and stir plate)
• Ice
• Large container to use as ice bath
• Paper towels
• Graduated cylinders for measuring solution volumes
• 50ml Erlenmeyer flask or beaker
• Droppers/pipettes
• 0.0189 g NaBH4 (sodium borohydride) (available from Aldrich)
• 0.017g AgNO3 (silver nitrate) (available from Aldrich)
o g polyvinyl pyrrolidone (PVP) (available from Aldrich)
• 8-10 g polyvinyl alcohol (PVA) (available from Aldrich)
• liter distilled water
1. Prepare stock solutions. (These volumes will provide enough solution to do the synthesis below 25 times.) a. For 1.0mM solution of HAuCl4·3H2O: Dissolve 0.1 grams of HAuCl4·3H2O in 500 ml of distilled water. Solution can be made in advance if stored in a tightly sealed, brown bottle. b. For 1% solution of trisodium citrate: Dissolve 0.5 g Na3C6H5O7·2H2O (sodium citrate) in 50 ml of distilled water.
2. Add 20 ml of 1.0 mM HAuCl4 solution to a flask/beaker. Add magnetic stir bar to flask/beaker.
3. Place flask/beaker on hot plate. While stirring, heat solution to a boil.
4. Once boiling, add 2 ml of 1% trisodium dihydrate solution. Continue heating.
5. The gold nanoparticles (a.k.a. colloidal gold) will gradually begin to form during the heating process (approximately 10 minutes).
6. Remove flask/beaker from hotplate when a deep red color is obtained.
7. Slowly, add enough polyvinyl alcohol (PVA) solid to the warm solution to make a 4% (mass/volume) solution (about 1 gram for a 22 ml solution). Heat the solution gently to dissolve the PVA. Note: some of the PVA may not dissolve, but solution should be heated, while stirring, until a majority of the solid dissolves.
8. Decant solution into storage bottles (or silicone bake molds if making stained glass pieces at this time). Decanting will help separate the nanoparticles/PVA solution from the undissolved PVA.
1. Prepare stock solutions. (These volumes will provide enough solution to do the synthesis below 8 times.) a. For 1.0 mM solution of AgNO3: Dissolve 0.017 g AgNO3 in 100 ml of distilled water. This solution can be stored for later use. b. For 2.0 mM solution of NaBH4: Dissolve 0.0189 g NaBH4 into 250 ml of distilled water. This solution MUST be made fresh each time. c. For 0.3% polyvinyl pyrrolidone (PVP): Dissolve 0.1 g PVP in 33 ml of distilled water. This solution can be stored for later use. 2. Place ice in large container
3. Add 30 ml of the 2.0 mM NaBH4 solution to a flask/beaker. Add magnetic stir bar to flask/beaker.
4. Place flask/beaker in ice bath. Place ice bath on stir plate. Stir and cool the solution for approximately 20 minutes.
5. Slowly, drip 2 ml of 1.0 mM AgNO3 into the stirring NaBH4 solution. Drops should be added at approximately 1 drop / second. Stop stirring AS SOON as all of the AgNO3 solution has been added. The solution should appear yellow, indicating the presence of silver nanoparticles.
6. Remove flask/beaker from ice bath and remove the ice bath from the stir plate.
7. Add 1 drop of 0.3% PVP solution.
8. Place the flask/beaker on the hot plate and heat the solution gently.
9. Slowly, add enough polyvinyl alcohol (PVA) solid to the warm solution to make a 4% (mass/volume) solution (about 1 gram for a 32 ml solution). Heat the solution gently to dissolve the PVA. Note: some of the PVA may not dissolve, but solution should be heated, while stirring, until majority of the solid does.
10. Decant solution into storage bottles (or silicone bake molds if making stained glass pieces at this time). Decanting will help separate the nanoparticles/PVA solution from the undissolved PVA.
1. Pour solution into silicone bake molds. The amount of solution in each mold does not need to be precisely measured. Pour at least enough in to cover the bottom of the mold.
2. Evaporate water from solution. This can be done by leaving the solutions to dry overnight. Depending on temperature and humidity of prep room, some pieces may require more drying time. For more predictable (and shorter) drying times, the solutions can be heated in a toaster oven at 225º F for approximately two hours (or until dry). Thicker disks will require longer drying times.
3. Once dry, remove nanostained “glass” disks from molds. Large batches of disks can be made in advance and stored indefinitely.
1. Download and print the take-home card file. Note: There are two files: front and back. The card is double sided, with a specific orientation. The circle drawn on the back side should line up with the empty space on the lower right hand side of the front side. The cards work best when printed on cardstock, and each 8.5” x 11” sheet results in four take-away cards.
2. Using a 1” circle craft punch, punch out the circles on the cards. This will serve as a ‘window’ for the stained glass pieces.
3. Cut lamination sheets into 1.5” x 1.5” squares. Each card will require two lamination squares.
4. Make sample card to share with visitors as they are preparing their own.
5. (optional) Pre-cut some of the nanostained glass pieces into sizes that fit within the circle for visitors to use during assembly/cart demonstration
1. Gather supplies necessary for one take away card: two 1.5”x1.5” lamination squares, one pre-punched take away card, and one gold and one silver nanoparticle stained “glass” disk.
2. Remove backing from one of the lamination squares and affix it to the take away card so that it covers the punched hole. The sticky surface of the lamination square will provide a nice surface for the nanostained glass pieces to stick to. Turn the card over, so that the sticky side of the lamination square is facing up.
3. Using scissors, cut small pieces off of the gold and silver nanoparticles disks. The pieces should be small enough to fit within the punched circle. Place the pieces on the sticky side of the lamination square.
4. Remove the backing from the second lamination square and affix it to the take-away card, sealing the nanoparticles stained glass pieces between the two lamination squares
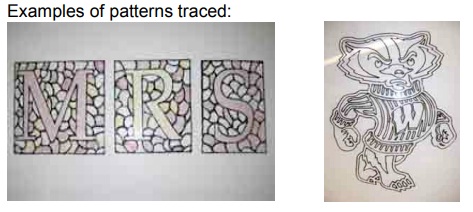
1. Select a pattern for the collaborative stained glass panel. The pattern can be anything that the presenter chooses: a preexisting stained glass pattern, a logo, a free hand drawing, etc. A tracing template can be created in a graphics program, such as Adobe Illustrator, or a template downloaded from the Internet. One interesting and easy option is to print and enlarge an existing logo or image and trace it.
2. Trace a pattern on the plexiglass panel with a permanent black marker. Slowly trace over the marker lines with the liquid leading. Draw lines that are approximately 1/8”, with no gaps. If the lines do not meet, the solutions will not be contained. The liquid leading requires at least 30 minutes to dry.
Color comes from the frequency of a light wave—the number of waves per second hitting our eyes. Normally when light strikes an object, some frequencies are absorbed and others are reflected. We see the color of the reflected light. When light hits metals, however, some of the light waves don’t reflect, but propagate—they move along the surface. This creates a plasmon—a group of electrons running back and forth in sync. If the plasmon moves moving back and forth at the same frequency as the light wave that produced it, then the electrons start giving off light in that color—even if that color is not one the metal would normally reflect.
Artists melted sand to make glass, and added chemicals for color. Pieces of colored glass were cut from large sheets into the approximate sizes and shapes needed for the desired pattern in the window being created. Artisans then used a diamond grinder to grind down the glass to its desired shape. In medieval times, the pieces of glass were then assembled into a window using lead strips (called lead came) to hold the glass in place. The joints between the glass and the lead strips were soldered together, to fill in the gaps between the glass and the premade lead came. Lastly, the window was glazed to strengthen all of the glass/lead joints. Later, a new method was created, called the LaFarge Method, which allowed artisans to create more intricately detailed patterns. Copper foiling was used in place of the lead came. Since the copper foil was more malleable, it could be fitted around the smaller, more delicate pieces.
1.http://mrsec.wisc.edu/Edetc/nanolab/gold/index.html
2. http://mrsec.wisc.edu/Edetc/nanolab/silver/index.html
Plasmon resonance websites:
3. http://en.wikipedia.org/wiki/Plasmon
4. http://www.qub.ac.uk/schools/SchoolofMathematicsandPhysics/con/plasmon/sp1.html
5. http://www.ifa.hawaii.edu/~kaiser/wavemovies/movies/packet.gif
