Spytec Activation https //activation.spytec.com/ : Activate your Spytec GPS Tracker
A step-by-step guide for activating your new tracker and navigating the platform. The recommended web browser for activating your device and using the platform is Google Chrome.
Activate your Spytec tracker
Click here to visit our activation page.
- Enter your email address
- Create a password
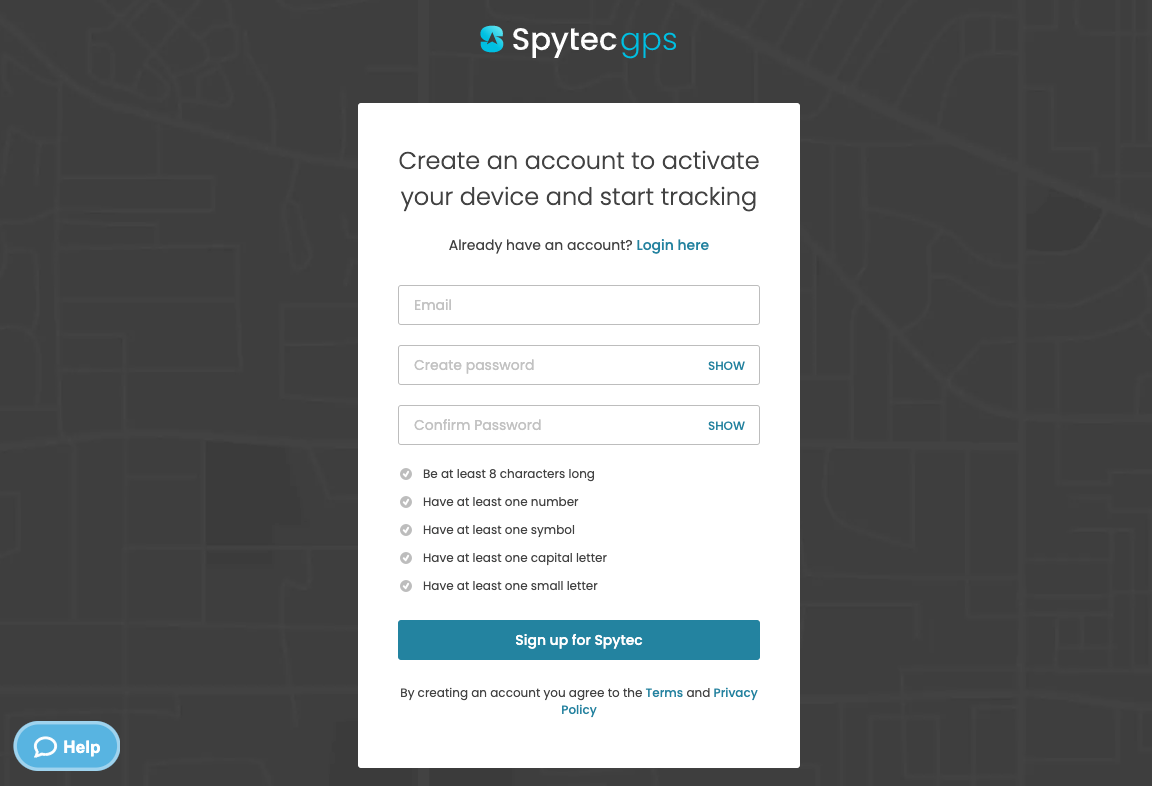
Set Up Your Account:
- Enter your name
- Enter your phone number.
- Provide a business name (if applicable)
- Select if tracking for business or personal use
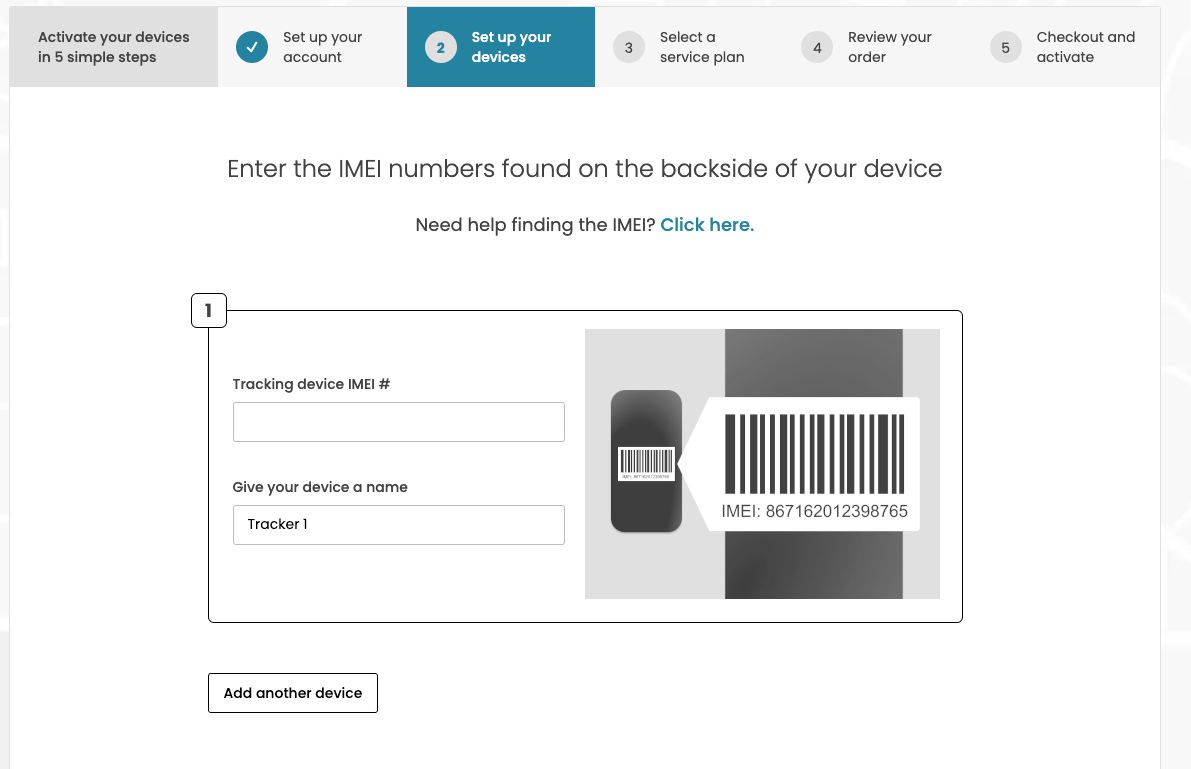
Set up your devices:
- Enter your IMEI number
- Name your tracker
- Use the “Add another device” button if you’re activating more than 1 device
- Confirm the email and phone number where tracking alerts will be sent
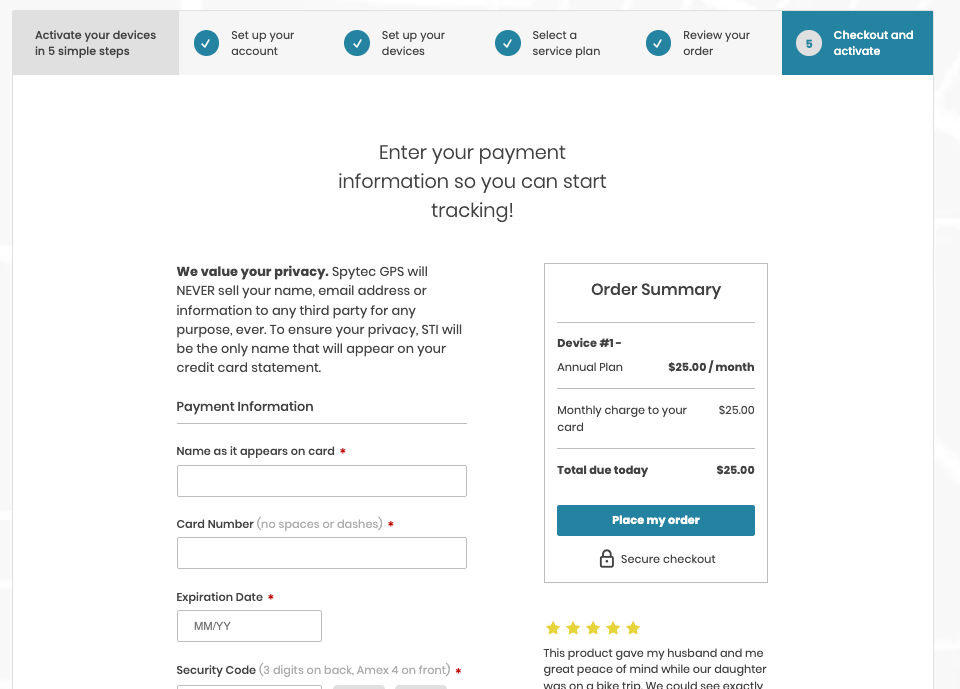
Select a service plan:
- Review your order
- Checkout
2. Connect your tracker to the platform
- Charge your tracker: Ensure your tracking device is fully charged. The device typically takes 4-6 hours to charge.
- Reboot your tracker: To power down, hold down the small power button on the top of the unit for 10-15 seconds, then release. Repeat this step to turn the unit back on. Please Note: the unit cannot be plugged in to the charger while performing this step).
- Test your tracker: Walk or drive around outside for 5 to 10 minutes with your tracker. The lights will indicate the connection of the tracker.
- Check your signal: Log in to your account to see if you’re getting a signal.
3. Place your tracker
Trackers are commonly placed:
- Inside a vehicle: Ideal placements are under the passenger or driver seat with the lights facing up. We don’t recommend placing the tracker in the trunk of a vehicle or the glove compartment. Locations that are fully enclosed in metal lead to poor connectivity.
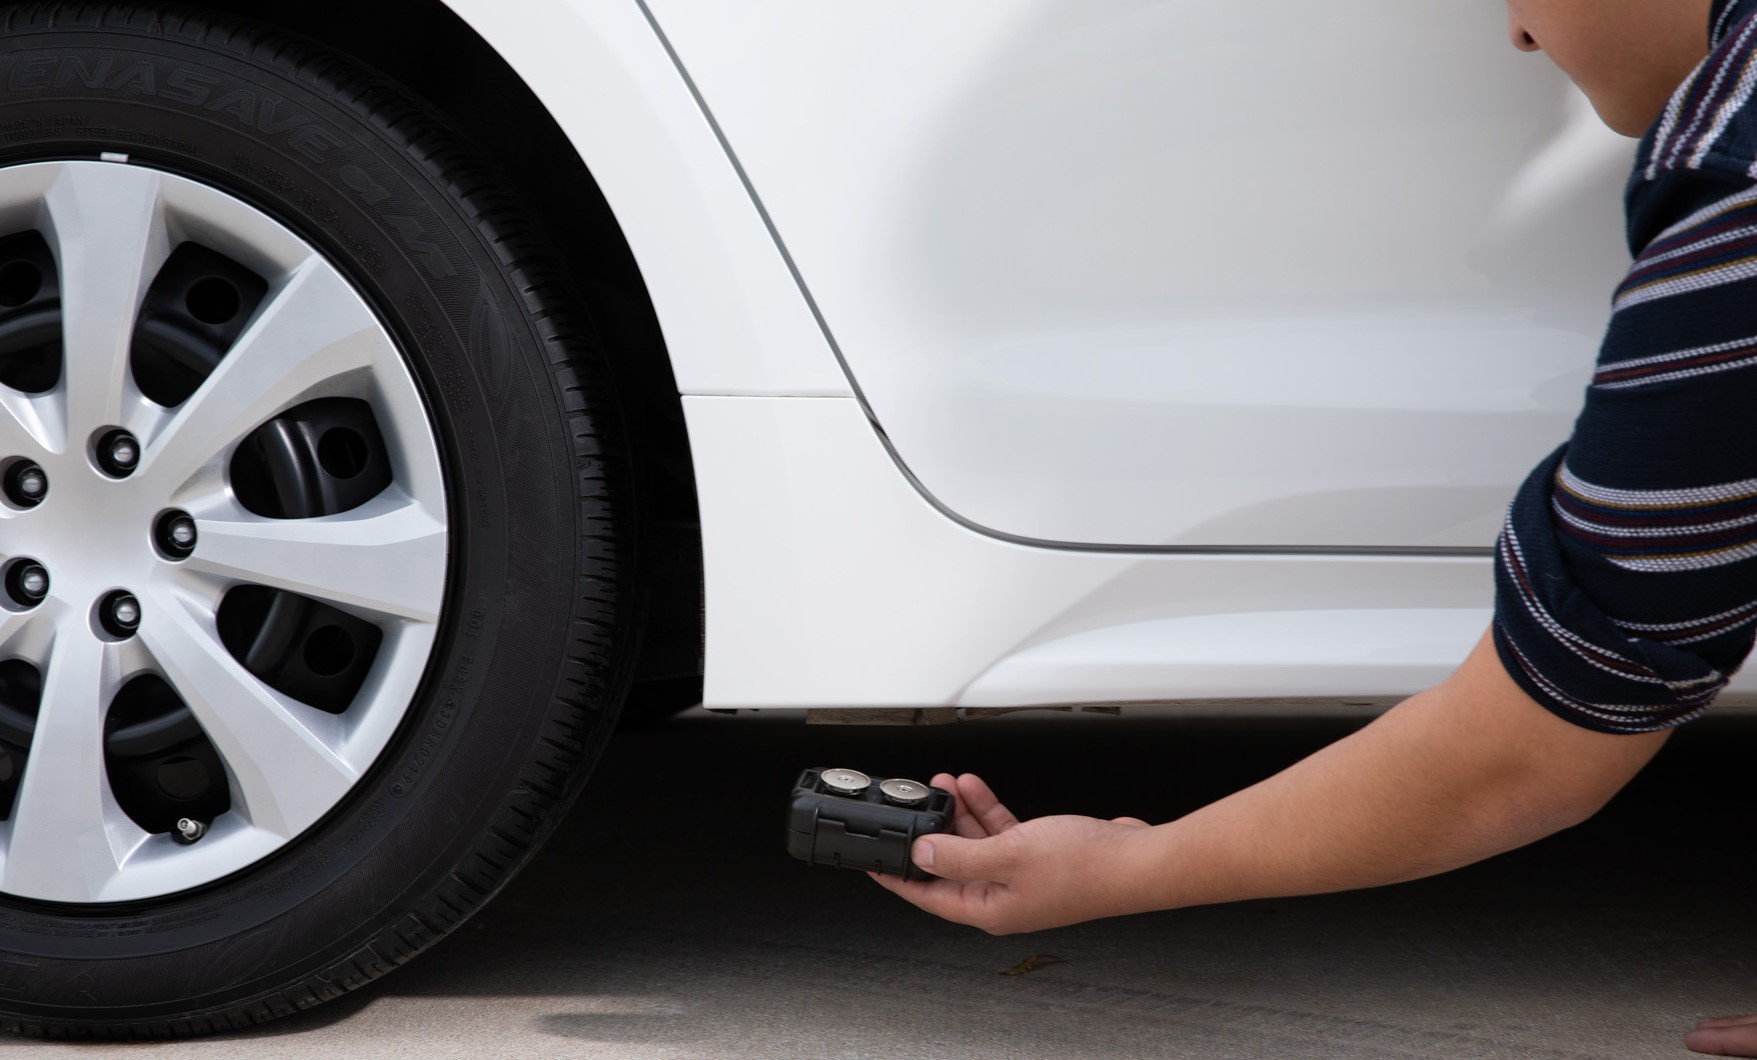
- On the undercarriage of a vehicle: you’ll need to pair the tracker with an M2 case.
4. Logging into the tracking platform
We offer both a website and a mobile app to view your tracker on the platform.
- You can log into the website at app.spytec.com
- Or download our mobile app. Our app works on both Apple and Android devices:
- After logging in, review this article to get familiar with icons and symbols used in the Desktop and Mobile apps.

5. Customize your tracker
Customize your tracker in your Trackers Preferences:
- Name of the tracker
- Tracker description
- Color of the tracker on the map
- Tracker icon
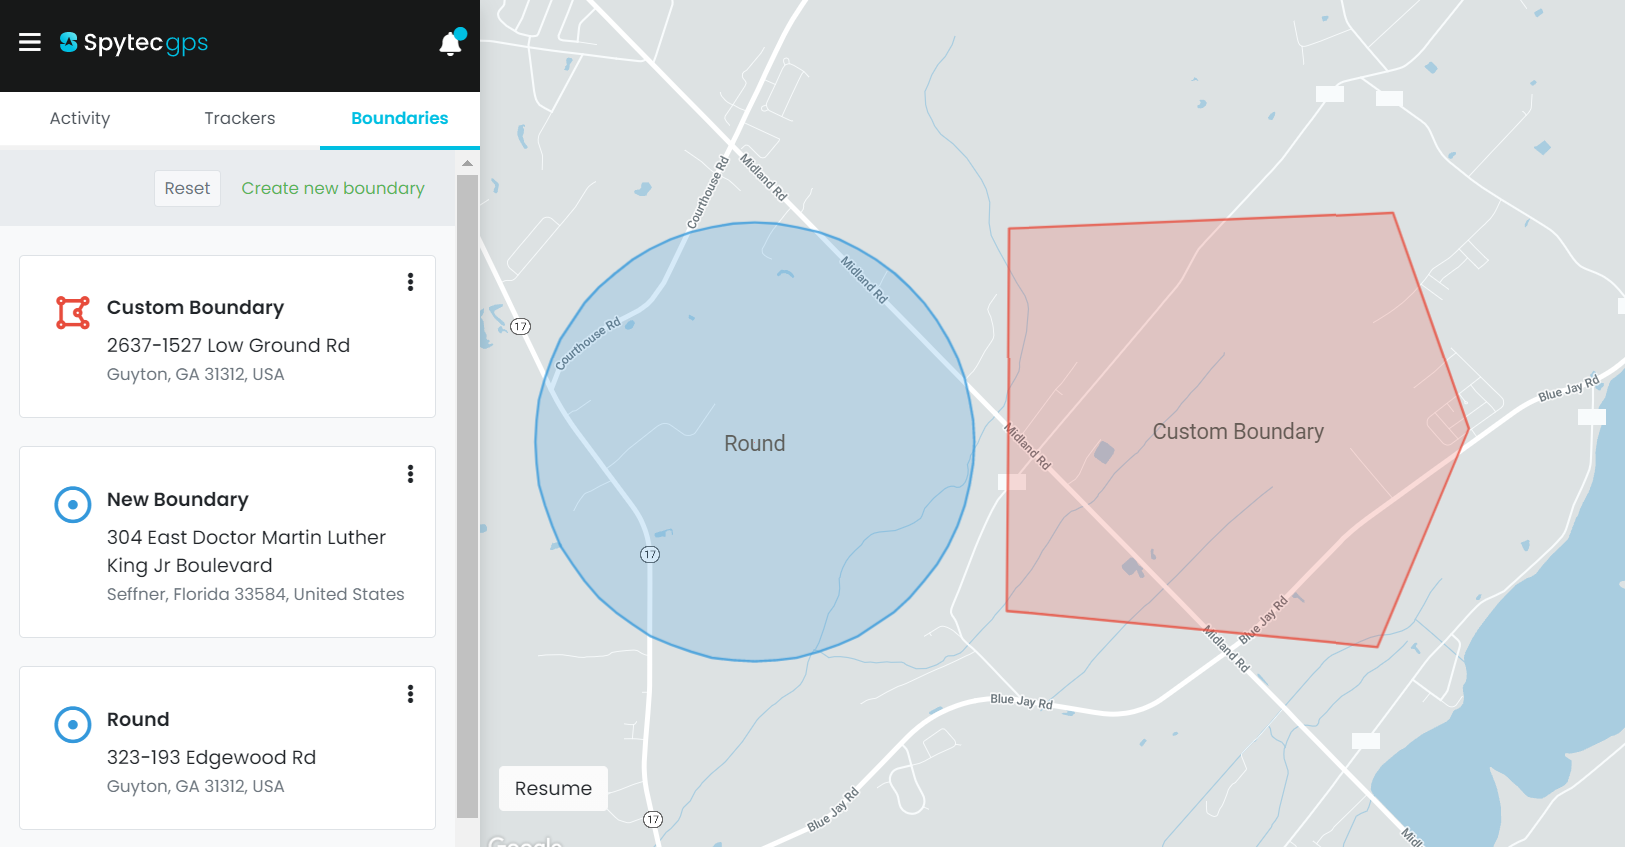
6. Create a boundary
Boundaries allow you to keep track of your device if it enters or exits a certain location.
Customize a boundary:
- Name your boundary
- Choose the shape
- Size the boundary over the area you wish to serve as the center point of the boundary.
- Save and create more boundaries
We offer two types of boundaries to place on the map:
- Round: Used when looking to place a quick boundary over a general area. As the name indicates, the boundary area will be in the shape of a circle.
- Custom Draw: Used when looking to outline a specific, custom area on the map (i.e. a city block, or county).

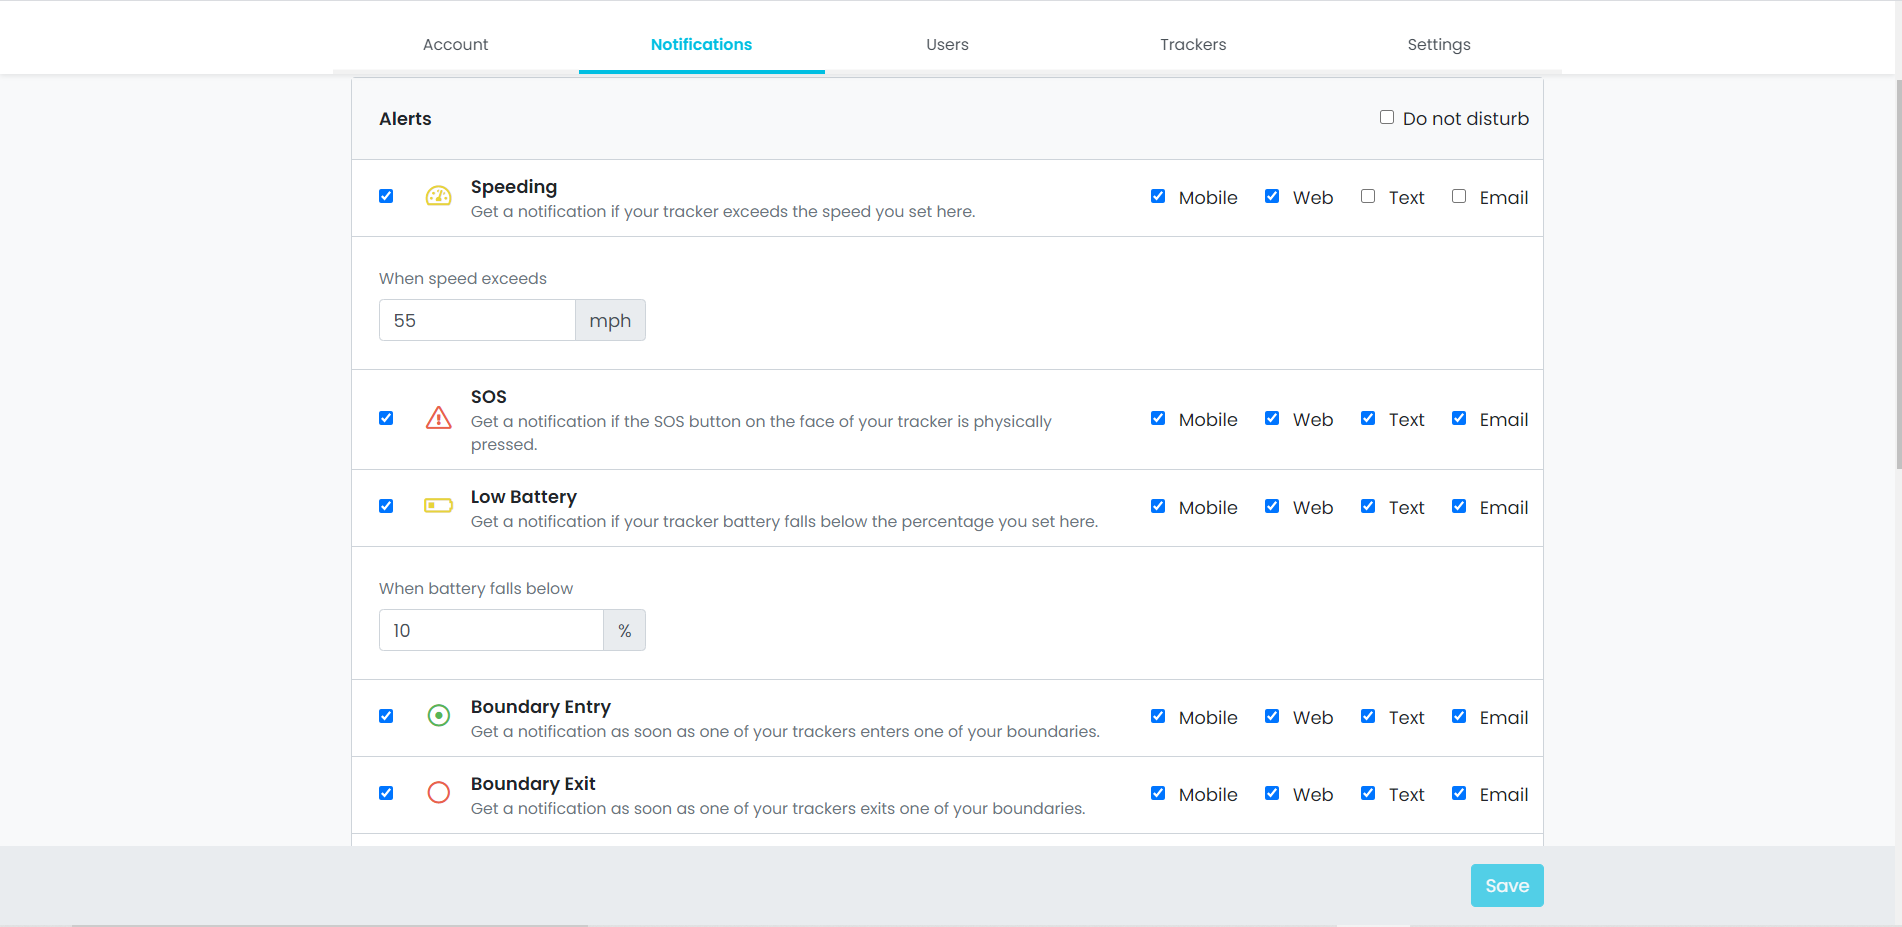
7. Set up notifications
Notifications can alert you when:
- Your tracker starts moving
- The tracker battery is low
- A tracker has entered a boundary entry, etc.
Set up alerts:
- Go to your Preferences
- Click on the notifications tab
- Select the different alerts you’d like to receive
- Save your settings
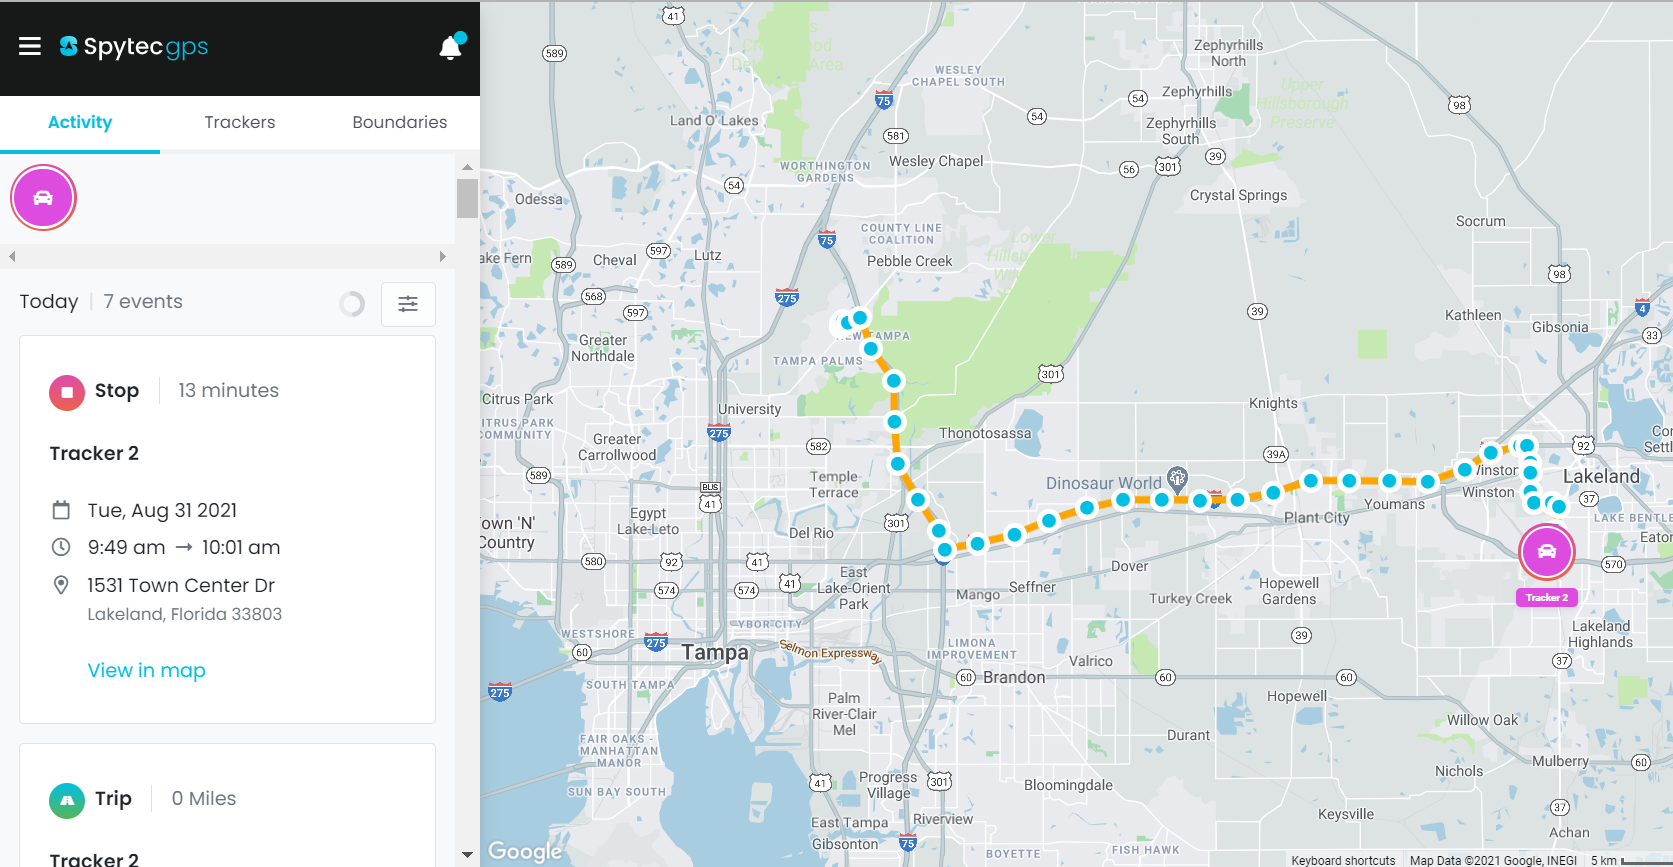
8. View your tracker’s activity
You can view your tracker’s activity by clicking on the Activity tab or by accessing reports.
Activity tab on app.spytec.com
Here you can view your recent trips and stops. Use the ‘view in map’ link to view the route the tracker has taken on the map:
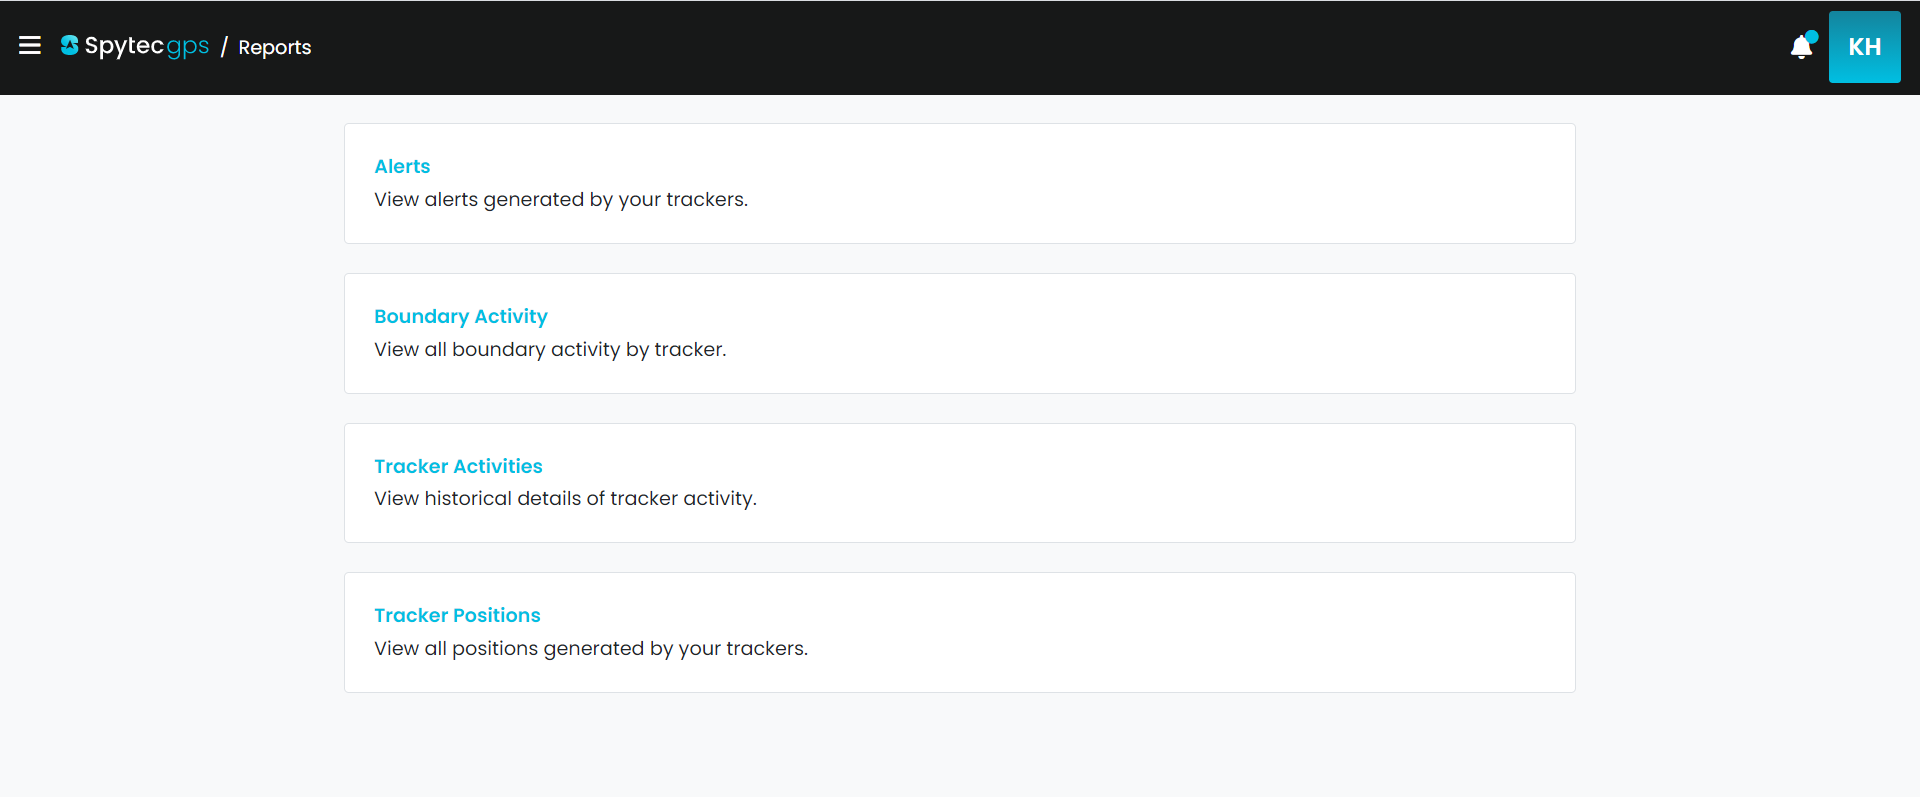
Accessing reports
- Click on the menu on the top left and select ‘Reports.’
- You will be given a list of different reports to chose from to view your past activity.
- You also have the option to export the file as well.
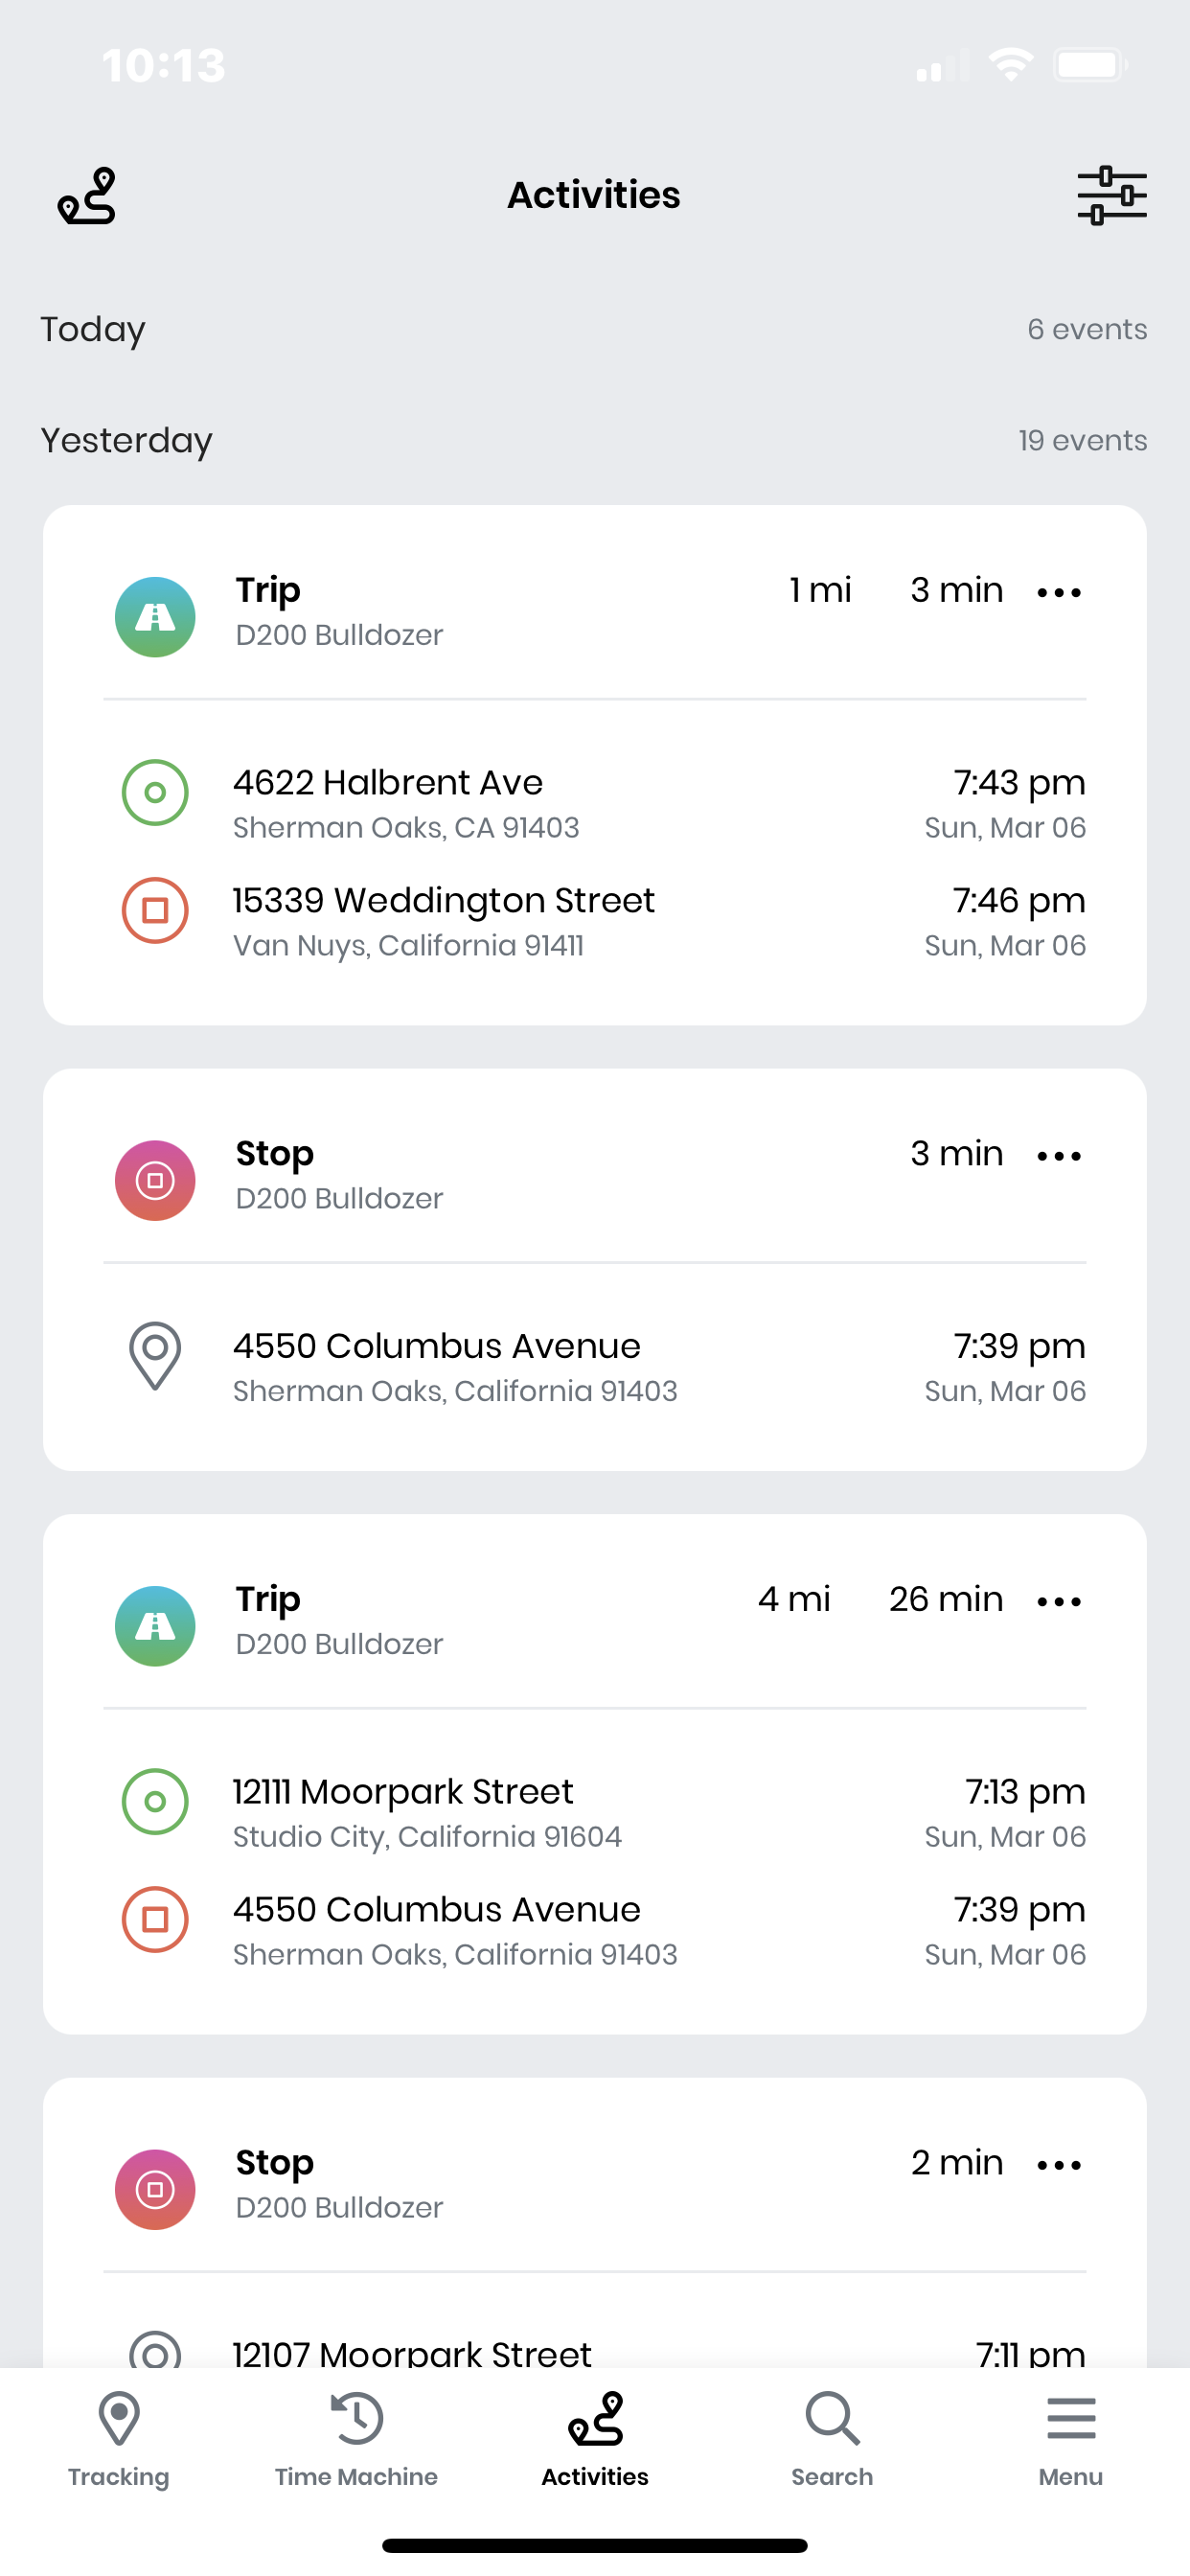
Viewing activity on the mobile app
- Click on the menu on the top left and select ‘Activity.’
- This will give you a list of your recent positions.
- Filter through your activity by clicking on the icon on the top right to select a specific date that you would like to view.
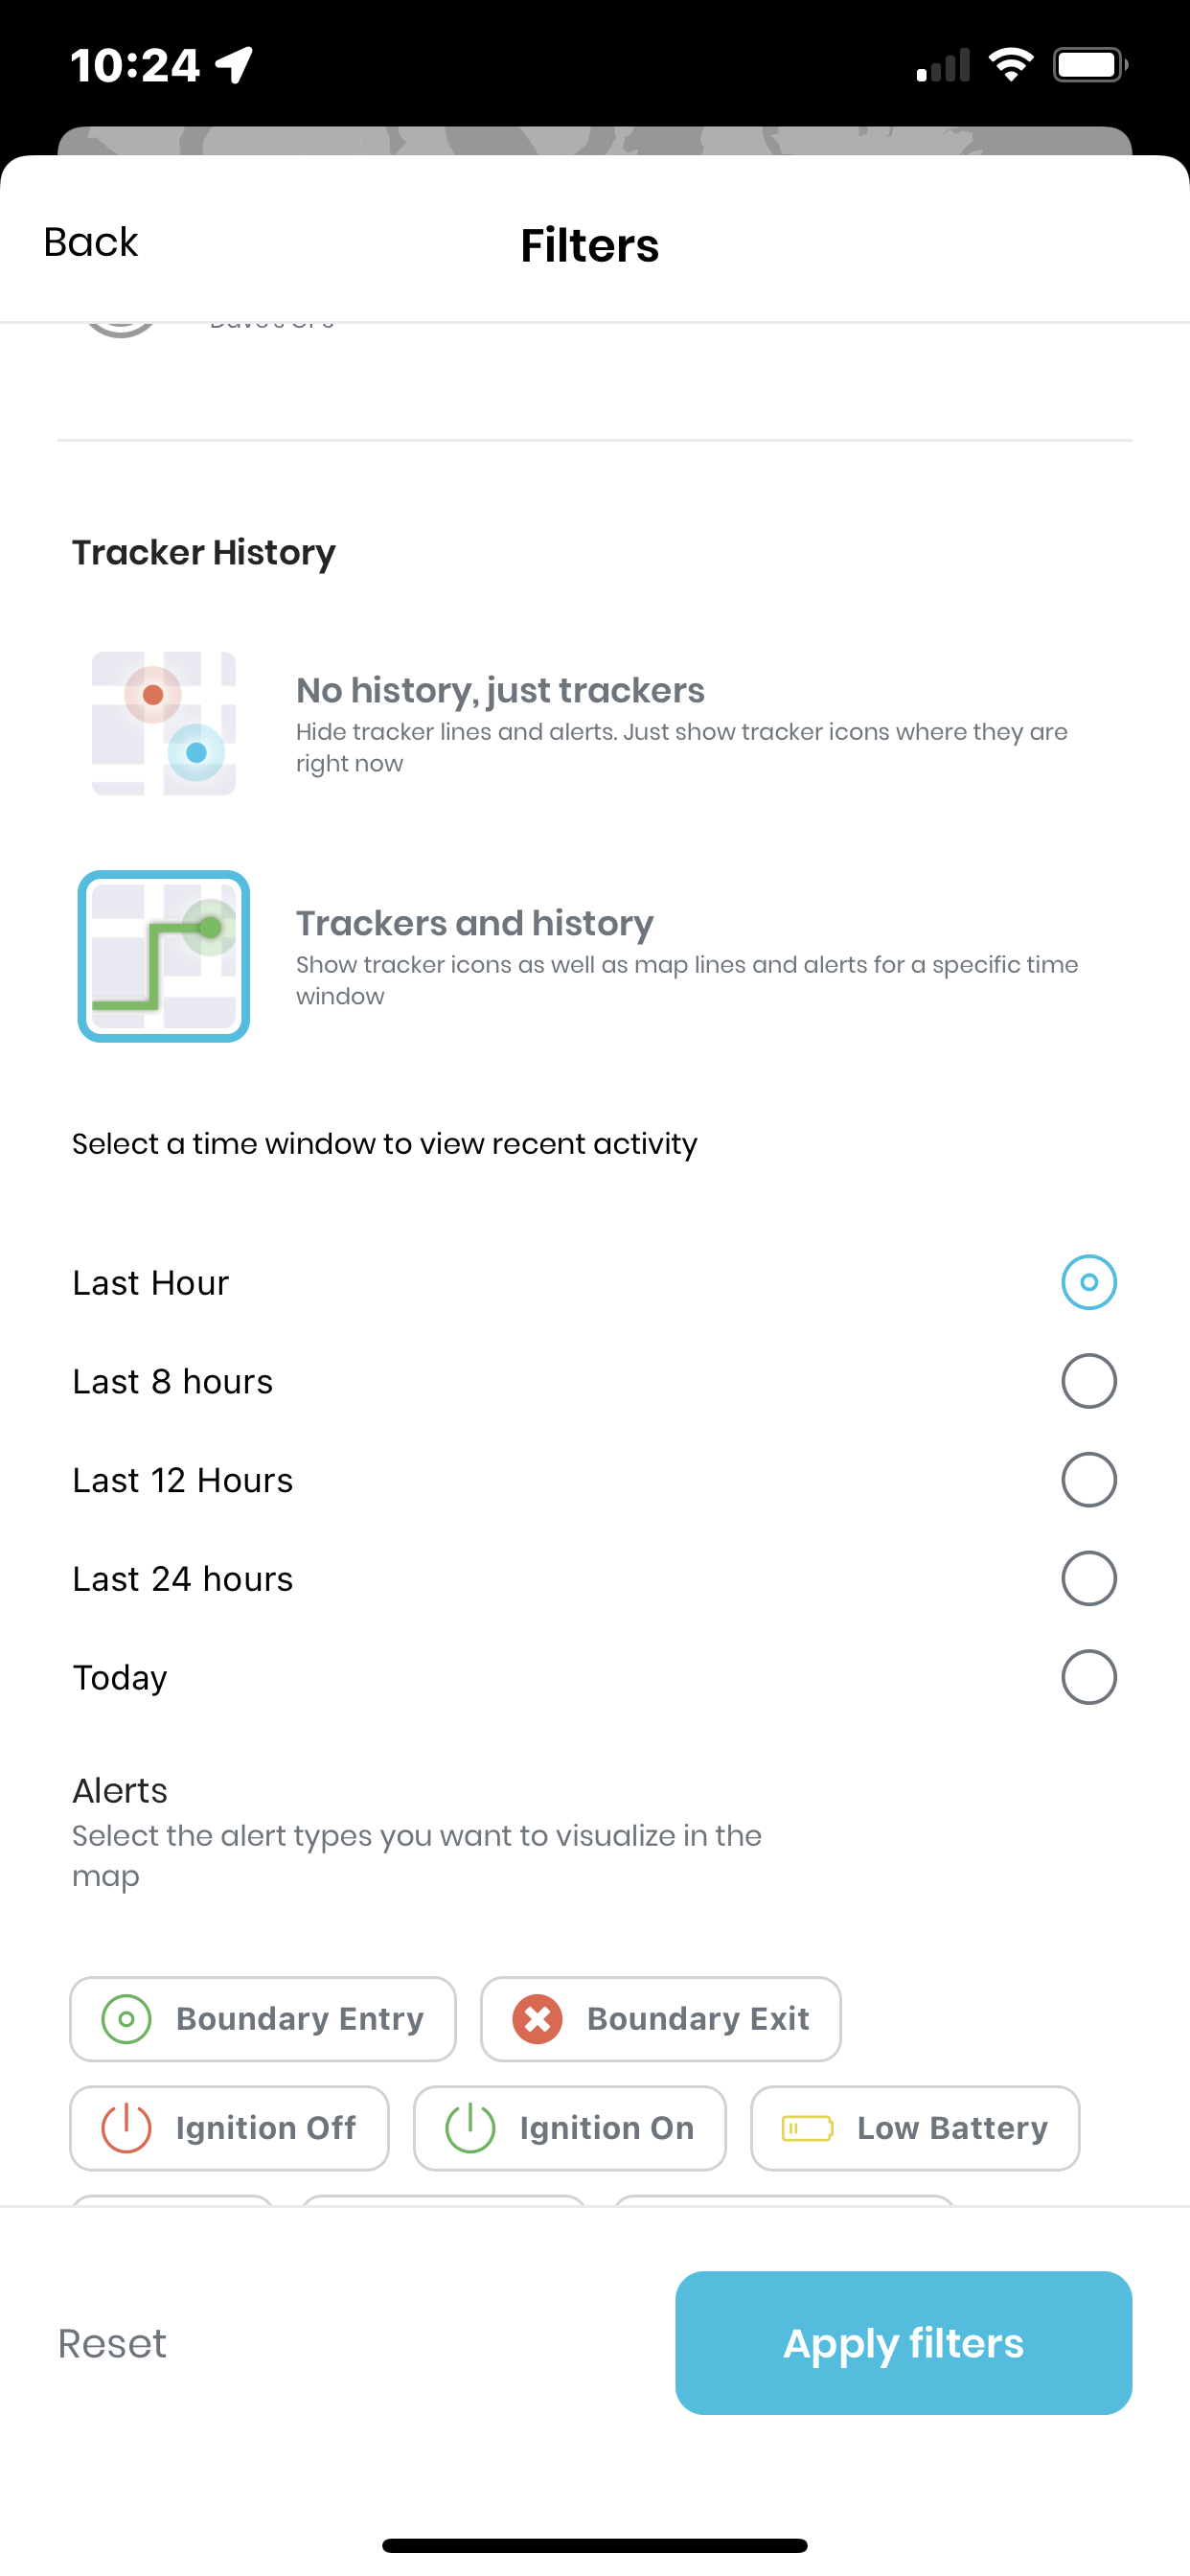
View the history that the tracker has taken on the map
The ‘Trackers and history’ option allows you to see all trips and stops from your tracker, up to the last 24 hours on the map. You can also include the alerts that were triggered along the trip.

Be the first to comment