Sea Of Stars Walkthrough : Understand The Combat Meters And How They Refill
As you play Sea Of Stars, you’ll notice three main meters you must manage in combat, so it’s critical to not only understand how they work but also how you can restore them. You have HP, MP, and Combo.
HP and MP are common in JRPGs, with the first controlling your health and the second your magic and abilities. However, your HP and MP won’t restore between battles, or at save points. That means you’ll need to use items to restore your HP or find campsites to restore both stats. Some bosses will also fully restore your health before you start.
As for MP, you’ll gain some of it whenever you perform a normal attack on enemies. Doing so means it’s important for you to balance your MP use with your attacks.
NOTE
You may want to hold off on attacking an enemy, unless they have a vulnerability to physical attacks. The only exception applies to your healing characters, like Vale, since you’ll want to save their MP to protect your teammates.
Combos will build up as you perform actions and fight in combat. However, they reset when the battle ends, so you should use them as you see fit.
You’ll unlock more Combos as you play through the game, allowing you to deal damage to enemies and heal your teammates. With that in mind, you can hold onto your Combos for offense or support, so remain flexible and use them as you see fit.
Dealing With Timers, Vulnerability, And Weakening
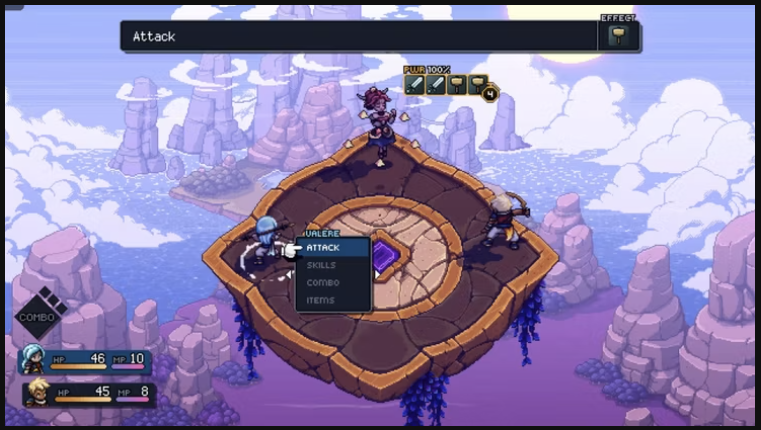
As you go through combat, you’ll encounter multiple mechanics that you must utilize to survive encounters. First and foremost, you should pay attention to the timers above your enemies.
As their turns approach, a clock with a number in it will let you know when it’s their turn. You can focus your efforts on enemies that are about to have their turns, so you’ll take them out before they attack.
You can also plan your moves accordingly, having your character attack an enemy with two turns until they attack, and if you don’t take them out, use a healing spell to save your party before the monsters can strike.
You should also pay attention to vulnerability and weakening during combat. Vulnerability isn’t explicitly stated, but if you use an attack type that the enemy is weak to, the text “Vulnerable” will appear on the screen.
You can inflict this with various weapon and magic types, including blunt, sun, moon, and more, so test out your different types and see what works best.
As for weakening, if the enemy is preparing a spell, you can cut down its damage by inflicting the elements shown above them, up to half damage.
So, for example, if they have two blunt and two slash symbols, you’ll need to land two blunt and two slash attacks to half the damage. Always prioritize these targets since doing so will allow you to use your offense as a defensive strategy.
When In Doubt, Mash The Confirm Button
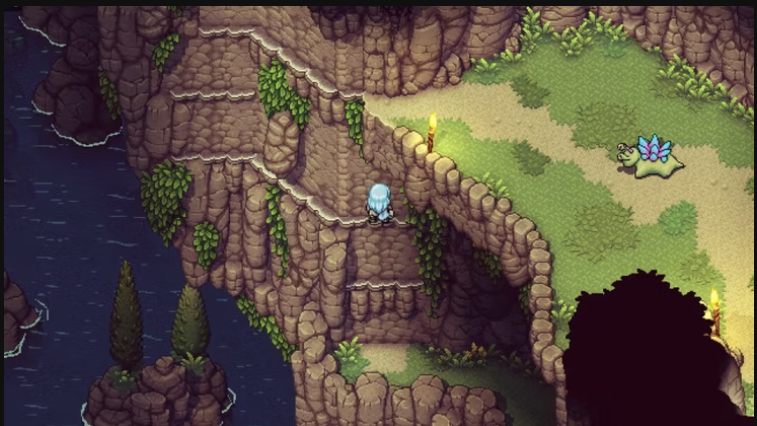
The game isn’t always clear where you must go on the map, since it has context-sensitive actions based on where you are. For instance, if you press confirm next to some ledges, you can climb them, but not other ones. Because of that, you may find yourself unable to continue through a section or stuck in a dungeon since you can’t figure out where to go.
Luckily, you won’t have random encounters since you can see the enemies on the map, so you won’t run into any issues as you travel around on the map.
That means you can run to different parts and try to interact with everything you come across. Doing so could help you find objects that you didn’t know you could interact with, such as climbing walls, sliding across gaps, and even hopping up different sections.
You don’t even need to go up to specific objects if you find it too difficult. Just run around the area and mash the confirm button until you find what you need.
Doing so can also give you hints about the dungeon, showing you how the world works and allowing you to make the rest of the puzzles easy.
Give The Relics A Shot
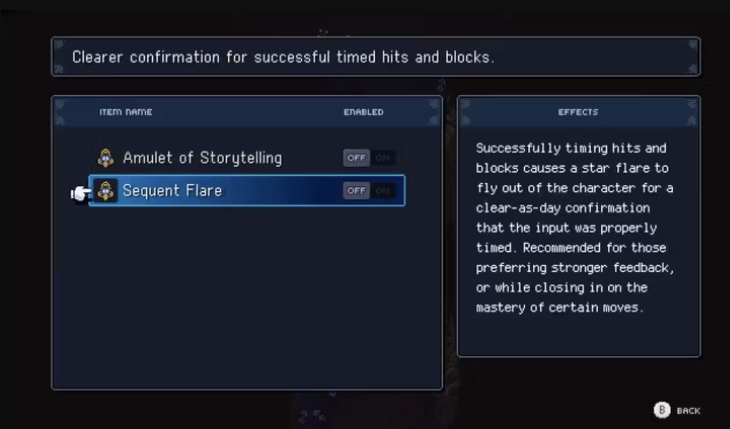
You have different Relics you’ll unlock, with the first two being the Amulet of Storytelling and Sequent Flare. Relics adjust how the game works, helping you to learn the mechanics while also making the game easier in different situations.
For instance, the Amulet of Storytelling increases your team’s HP by 100 percent and restores your HP after every fight. This will make the game significantly easier, so turn to it if you want to breeze through the game.
On the other hand, Sequent Flare is an excellent Relic you may want to always have equipped. It causes a comet to shoot into the sky whenever you time your button presses correctly. That way, you know exactly when to press it and if you’re performing the action commands correctly.
[It’s great to not only show you how the different abilities work but can help you identify when to block attacks from enemies.[/b]
It never hurts to go through your Relics whenever you get them, so spend some time reviewing them. You should also get a feel for the timing mechanics in this game since they’ll boost your damage by about 30 percent and reduce the damage you take by roughly the same amount.
Relics don’t have drawbacks and do exactly as they say. Use them as you see fit to custom-tailor the game to your needs.
Understand Your Characters Through Stat Boosts
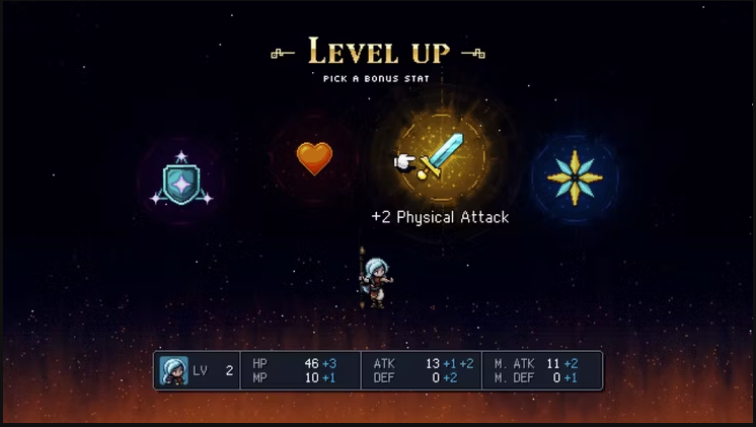
Whenever you level up, all your characters will have their stats increased, though you also get to pick another stat and receive a large boost. However, you can’t use it on any stat, but you can choose from four preset options. These stats will give you an idea of how a character works, allowing you to focus your efforts accordingly.
For instance, Valare emphasizes physical damage and defense, so you’ll want to focus on physical attacks to maximize her damage. On the other hand, Zale has access to Mana boost and magic damage, so you’ll want to focus on magic and healing. You’ll come across similar stat boosts as you unlock more characters, so look at them and get a feel for what they do.
You can also use their abilities to understand how they work. Valare mostly has damaging abilities, while Zale has a low-cost heal along with a high-cost magic spell. You can use that information to guide your choices and even your equipment, allowing you to make the most of their strengths and weaknesses. Since your MP takes time to recharge, you must maximize these stats if you want to survive.