Pound Key Activation Code for Microsoft Verification
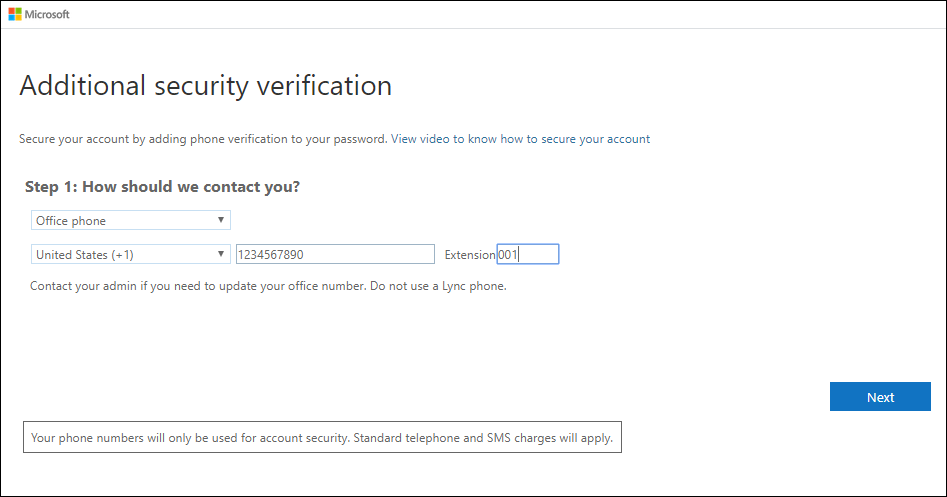
You’ll receive a phone call from Microsoft, asking you press the pound (#) sign on your office phone to verify your identity. You can set up your office phone to act as your two-factor verification method.
Combined Registration users won’t see an option to use an extension with the Office phone option.
Set up your office phone number as your verification method
1. On the Additional security verification page, select Office phone from the Step 1: How should we contact you area, select your country or region from the drop-down list, type your office phone number, and then type your extension, if you have one.
2. In Step 2, you’ll receive a phone call from Microsoft, asking you press the pound (#) sign on your office phone to verify your identity.
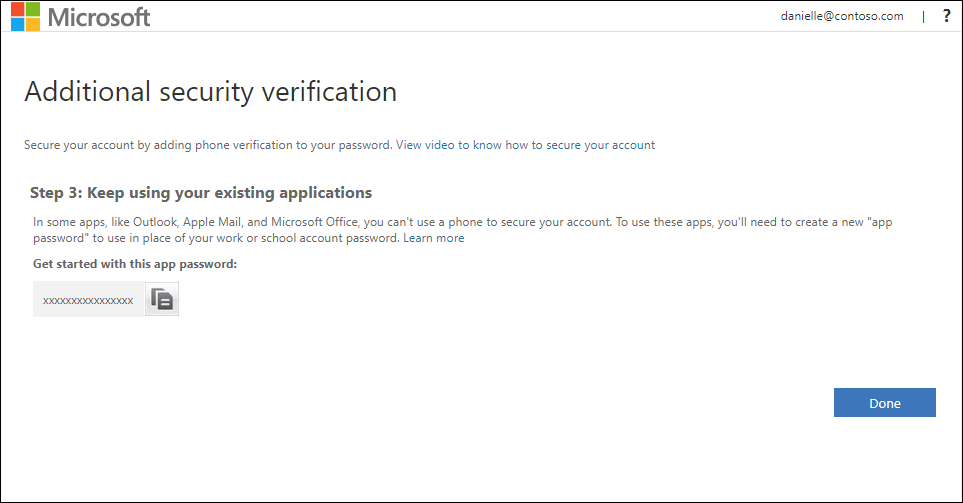
3. Copy the app password from the Step 3: Keep using your existing applications area and store it somewhere safe.

Note: You only need to use app passwords if you’re continuing to use older apps that don’t support two-factor verification.
4. Select Done.
Set up an authenticator app as a two-step verification method
You can set up an authenticator app to send a notification to your mobile device or to send you a verification code as your security verification method. You aren’t required to use the Microsoft Authenticator app, and you can select a different app during the set up process. However, this article uses the Microsoft Authenticator app.
Set up the Microsoft Authenticator app to send notifications
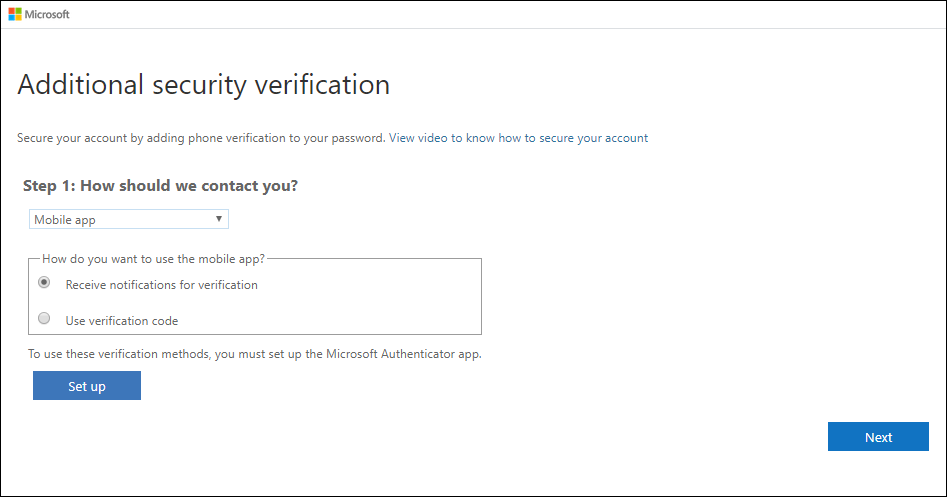
- On the Additional security verification page, select Mobile app from the Step 1: How should we contact you area.
- Select Receive notifications for verification from the How do you want to use the mobile app area, and then select Set up.

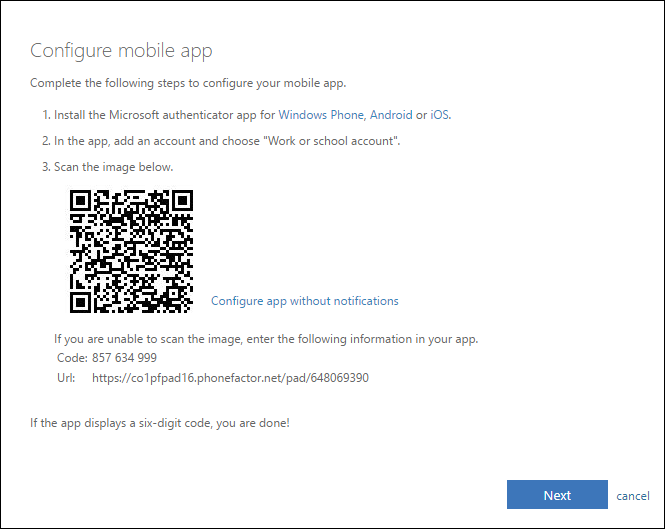
The Configure mobile app page appears.
- Open the Microsoft Authenticator app, select Add account from the Customize and control icon in the upper-right, and then select Work or school account.
Note: If you receive a prompt asking whether to allow the app to access your camera (iOS) or to allow the app to take pictures and record video (Android). select Allow so the authenticator app can access your camera to take a picture of the QR code in the next step. If you don’t allow the camera, you can still set up the authenticator app as described in Manually add an account to the app.
- Use your device’s camera to scan the QR code from the Configure mobile app screen on your computer, and then choose Next.
- Return to your computer and the Additional security verification page, make sure you get the message that says your configuration was successful, and then select Next. The authenticator app will send a notification to your mobile device as a test.
- On your mobile device, select Approve.
- On your computer, add your mobile device phone number to the Step 3: In case you lose access to the mobile app area, and then select Next. Microsoft recommends adding your mobile device phone number to act as a backup if you’re unable to access or use the mobile app for any reason.
- From the Step 4: Keep using your existing applications area, copy the provided app password and paste it somewhere safe.
Note: For information about how to use the app password with your older apps, see Manage app passwords. You only need to use app passwords if you’re continuing to use older apps that don’t support two-factor verification.
- Select Done.